How to Make Rhinestone Fringe
You may not think it when you first see rhinestone fringe, but it’s actually a pretty challenging project. It requires very fine motor control to cut out the pattern and glue on those rhinestones. But the end result is quite spectacular. This fringe can be used for so many different projects that you’ll have no problem finding a place for it. Check out these tips to help you master this fun project! And remember… practice, practice, practice!
What You’ll Need
– Fabric – Whatever type of fabric you choose, it needs to be stiff enough to hold the rhinestone fringe in place. Because of that, natural fabrics are usually a better choice than ones that are very soft. Especially with rhinestone fringe, you want a fabric that will keep its shape.
– Rhinestones – The size of the rhinestones you choose for your rhinestone fringe depends almost entirely on personal preference. If you’re making a large rhinestone fringe, you might want to go with larger rhinestones. And if you’re making a small fringe, you’ll probably want smaller rhinestones.
– Rhinestone glue – This glue is used to hold the rhinestones in place and is the best way to make rhinestone fringe. Other glues can come loose too easily and cause the rhinestones to fall off.
– Scissors or a rotary cutter and mat – You need these tools to cut out your rhinestone fringe pattern. Regular scissors work fine, but a rotary cutter is much more accurate.
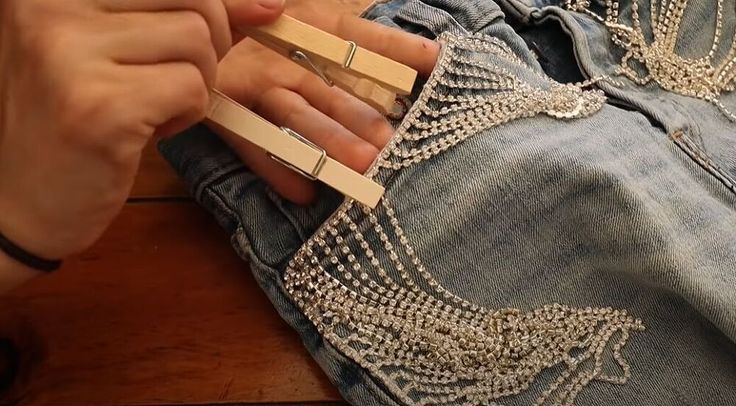
– Iron – After you cut out your rhinestone fringe and glue on the rhinestones, you’ll need to iron your rhinestone fringe to make sure it’s flat and crease-free.
– Sewing machine – If you have a sewing machine, you can use it to make rhinestone fringe. This method can be easier for beginners who are new to rhinestone fringe making.
Cutting Out the Pattern
This is one of the most important parts of the rhinestone fringe making process and it can be very easy to mess up here. First, choose which direction the rhinestone fringe pattern will go. Most rhinestone fringe patterns go up and down, but some may go side to side. Depending on the pattern, you’ll either want to cut out your rhinestone fringe pattern vertically or horizontally. To cut out your rhinestone fringe pattern, you want to put your fabric on top of a rotary mat. The rotary mat will help you keep your fabric flat and in place while you’re cutting it out. You can also put a piece of paper or fabric down first to prevent having rhinestone fringe crumbs on your rotary mat. After you put the fabric down on your rotary mat, you need to determine how big to make your rhinestone fringe pattern. There are a couple of factors to keep in mind when doing this. The first is that you want to make your fringe at least as long as your fabric is wide. If you have a long strip of rhinestone fringe fabric, then you can make it go almost the entire length of the fabric. Once you decide how long you want your rhinestone fringe pattern to be, you can start cutting. You want to make sure that you don’t cut off the edge of the fabric and that you don’t cut off any part of the pattern.
Glue and Stick: How to Make Rhinestone Fringe
Once you’ve cut out your rhinestone fringe pattern, you can glue and stick the rhinestones. You’ll want to make sure that you do this on a surface that won’t get ruined by the glue. A hard, flat surface is best. You can use a piece of cardboard or a hard surface on your table. Once you’ve decided on your surface, lay out your rhinestone fringe pattern on top of it. Make sure that the rhinestone fringe pattern is in the right direction. You don’t want to accidentally glue the rhinestones facing the wrong way! Once you have the rhinestone fringe pattern placed, it’s time to glue on the rhinestones! Make sure to use simple rhinestone glue for this. You want to make sure that the rhinestones are completely covered in glue, but you don’t want the glue to squirt out of the rhinestone. If it does, you’ll end up with little blobs of glue all over your rhinestone fringe pattern.
Sewing Machine: How to Make Rhinestone Fringe
If you have a sewing machine, you can use it to make your rhinestone fringe. First, cut out your rhinestone fringe pattern. Lay your rhinestone fringe pattern on top of the fabric that you want to use to make your rhinestone fringe. Pin your fabric down to keep it in place. Once your rhinestone fringe pattern is in place, you can start sewing it together. Make sure to leave a small opening at the end of the fabric so you can flip it inside out and close the seam after you’re done sewing. Once you’re done sewing the rhinestone fringe, turn it inside out and close up the seam you left. Make sure that the seam is on the inside of your rhinestone fringe pattern so you can’t see it when you use it. And you’re done!
Help! My Rhinestone Fringe is Coming Off!
There are a few things that can cause your rhinestone fringe to come off. If your rhinestone fringe comes off while you’re wearing it, the first thing you should do is try to put it back on. If it’s an uneven fringe, try to make it even. If it’s just on an edge, try to stick it back on. If you can’t get it to stay on, you can always sew it back on. Once your rhinestone fringe has fallen off and you want to put it back on, you can use this method. First, iron your rhinestone fringe. You want to make the rhinestone fringe as flat as possible. Then, use Modge Podge or fabric glue to stick the rhinestone fringe back on. Make sure to put a lot of glue on your rhinestone fringe and on the fabric that you’re putting it on. Press the rhinestone fringe to the fabric and let it dry.
Conclusion
Rhinestone fringe is a very challenging project that requires a lot of patience, but the end result is truly stunning. Once you’ve mastered the art of rhinestone fringe, you’ll be able to use it for a variety of different projects, such as home decor, costumes, and more.
Leave a Reply
You must be logged in to post a comment.